

Thinking about going solar? Learn how to install solar panels on your roof with this step-by-step guide. Discover planning tips, installation steps, safety advice, and how to start saving on your electricity bill.
Introduction
Going solar has never been more accessible—or more beneficial. Installing solar panels on your roof helps reduce your energy bills, increase your home’s value, and lower your carbon footprint.
In this guide, we’ll walk you through the basics of installing solar panels at home, even if you’re a beginner. From planning your system to the final installation, this tutorial breaks everything down into simple, manageable steps.
What You’ll Learn in This Guide
This tutorial will teach you how to evaluate your roof, calculate your energy needs, choose your system, and complete the basic steps for a residential solar installation. Whether you’re DIYing or just want to understand the process before hiring a pro, this guide is for you.
Step 1: Assess Your Roof
Before buying anything, make sure your roof is suitable for solar panels:
- Sunlight Exposure: South-facing roofs with minimal shading are best.
- Roof Condition: Make sure your roof is in good shape. If it needs repairs or replacement soon, handle that first.
- Roof Angle and Size: The tilt and available space will determine how many panels you can install and their effectiveness.
Step 2: Calculate Your Energy Needs
Look at your electricity bills to find your average monthly usage (in kWh). Use this number to determine how many solar panels you’ll need. For example:
- If your home uses 900 kWh/month, and each panel produces 300 watts (about 30 kWh/month), you’ll need around 30 panels.
Many websites offer solar calculators to help simplify this step.
Step 3: Choose Your Solar System
There are three common types of systems:
- Grid-Tied: Connected to your local power grid; often allows net metering.
- Off-Grid: Independent, ideal for remote areas.
- Hybrid: Combines solar with batteries and a grid connection.
Select your solar panels, inverter (converts DC to AC), mounting system, and optional battery storage if needed.
Step 4: Get Permits and Approvals
Check with your local government and utility provider:
- You may need a building permit and electrical permit.
- If you’re connecting to the grid, your utility company will likely need to inspect and approve your system.
- Some areas offer tax incentives—apply early!
Step 5: Install Mounting System
Install the racking or mounting system first. These are typically attached directly to your roof’s rafters using bolts or lag screws.
Tips:
- Use a chalk line to ensure straight panel alignment.
- Always seal drill holes to prevent leaks.
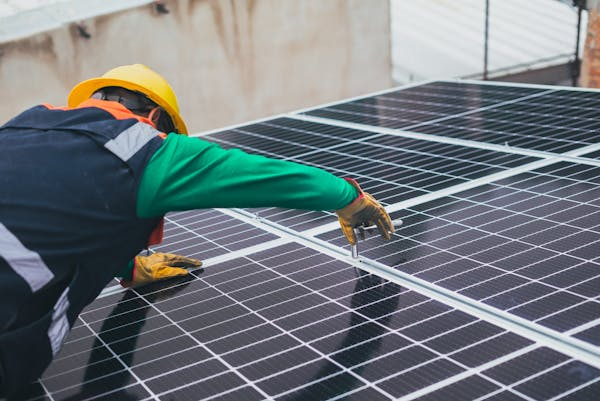
Step 6: Mount the Solar Panels
Secure the panels onto the racking system using clamps and brackets. Make sure they’re tightly fastened and tilted correctly to optimize sun exposure.
Step 7: Connect the Electrical Components
- Connect the panels to the inverter, which converts DC energy to usable AC energy.
- Connect the inverter to your home’s breaker panel.
- Install any battery storage if using a hybrid/off-grid system.
- Use conduit and wiring rated for outdoor use, and always follow local electrical codes.
Important: If you’re not an electrician, it’s strongly recommended to hire a licensed professional for this step.
Step 8: Final Inspection and Activation
After the system is installed:
- Get it inspected by your local authorities and/or utility provider.
- Once approved, your system can be connected to the grid (if applicable).
- Turn it on—and start producing clean, renewable energy!
Conclusion
Installing solar panels on your roof is an investment in your home, your wallet, and the planet. With proper planning and the right materials, you can set up a system that provides clean energy for decades. Whether you go full DIY or partner with a professional, understanding the installation process helps you make smart, informed choices.
A Real-Life Experience: My First Solar Panel Installation
A couple of years ago, I decided to reduce my electricity bills and take the leap into solar energy. I didn’t have any experience with electrical work, but I was confident enough to handle most of the setup myself—with some help from online forums and a neighbor who’s an electrician.
The hardest part? Figuring out how much energy my household actually used and choosing the right size system. I overestimated at first, which would have cost me thousands more. But after careful research, I scaled back to what I truly needed—and I’ve never looked back.
The day I flipped the switch and saw my meter spin backward was unforgettable. Now I check my solar app daily, and it’s satisfying to see just how much clean energy I’m producing. I highly recommend the journey to anyone ready to take control of their energy future.


